Monday, October 31, 2011

Like Greased Caramel

Caramel Pretzel Bites. A caramel unwrapped and flattened, wrapped around a pretzel nugget and dipped in chocolate. Sounds (and looks) amazing, and not terribly difficult, right? Such was my optimistic mood on Saturday morning when I got ready to try these babies. 3 ingredients, you can't go wrong. (Cue ominous music.)

As per usual, I couldn't quite do it exactly according to plan. I initially wanted to make these because I had a bunch of caramel left over from supper group the previous week, which I had made to dip apples in. The reason more of the caramel didn't get eaten was because I evidently boiled it a touch too long, so it was a little too stiff to dip things in, and it ended up being more of an item you spent the next 2 hours picking out of your back teeth, in a very unflattering manner.

So, my thought was that I'd heat up the caramel to make it a bit more fluid (which worked), and then roll it out. I got started by smartly covering the counter in wax paper. I dumped the caramel on top of the wax paper and put another on top of it and squished everything down. Then, I decided I probably better double-check that it wasn't sticking. Of course it was. Like the dickens, as the say. So, I painstakingly scraped most of it off the wax paper and threw the paper away.

Silly me, I thought. I should have greased the wax paper. Still optimistic, I greased up another set of wax paper good and proper. This seemed like it'd be a great solution, until I realized that as I rolled, the newly exposed caramel carried the grease away with it. Or something. Either way, the long and short of it is that the exact same thing happened. Disastrous sticking. More scraping. More throwing away of wax paper. (And yes, I was definitely losing caramel mass AND brain mass at this point.)

Finally, out of exasperation, I just greased the entire counter area and the metal rolling pin. Nothing stuck anymore. However, that meant the rolling pin just spun on the caramel and the caramel was moving all over the counter. The final solution ended up being me patting and stretching it into some generally desirable shape. (And trying not to scream.)

The next step was to stick the pretzels to the caramel. Turns out, when the caramel is as well-greased as mine was, the pretzels don't stick too well, but I was DETERMINED to make this work, in some form or another at this point. I more or less got the pretzels to wedge into the caramel a bit, and then tried dipping them in the melted chocolate chips (which actually is what the recipe called for). Apparently, I had conveniently forgotten (as I do once or twice a year), that I DESPISE dipping things, or doing anything that requires me to touch every single serving of something. With this background, the dipping was less than ideal.

After dipping three caramel/pretzel pieces, and realizing they were coming out looking like a big gloppy mess, to put it politely, I re-engineered the process. The final product ended up going something like this on some of my leftover greased wax paper: dab of chocolate, square of hardened caramel, dab of chocolate, pretzel. Done. End of story. While this definitely worked, I was more and more infuriated with every dab at how awry this activity had gone. (I had also just realized that these items would have to stay in the fridge if I didn't want the caramel to melt into each other, but that then the caramel would practically break off in your teeth, again leaving me with a lose-lose situation. At that point though, I was in too deep, I just had to finish it as a matter of principle.)

I thankfully finished all of the pretzel caramel situations, with an entirely greased counter, the belly of my shirt with giant chocolatey streaks, and chocolate up to my elbows. But, I still had a bunch of chocolate left over. I knew I should just throw it out and be done with it, given my current level of frustration, but if I was that sort of person, I wouldn't be in the current mess in the first place, as I would have thrown out the caramel a week ago. So, since I still had 2/3 of a bag of pretzels left, I just dipped those half way into the chocolate. Turns out, that was the easiest, most attractive thing I did all afternoon (though still time-consuming).

When all was said and done, I was so frustrated with the whole episode, I had to wash every dish in eyesight, wash every ounce of chocolate off me in a long shower, and throw the recipe away to even begin to alleviate the aggravation. I have not had a total disaster like that in the kitchen for a while. I would like to blame it on being pregnant, but we all know that is something that could have happened to me any day of my life. And I'm sure it will happen again. Oh well, here's to staying humble, right?

Tuesday, October 25, 2011

Church Cookbook Love

I was recently asked by my dear husband if I'd cook breakfast for the board meetings our church was hosting this last weekend. I agreed, knowing I could use a similar menu to what I helped my friend Liz make last year for another event. The menu was as follows: Baked Oatmeal, Yogurt, Fruit, and Granola (for the yogurt). Added bonus: all gluten-free, as one of the board members is gluten-intolerant. (Though in case you're wondering, while oatmeal is gluten-free in theory, it's often processed in plants that process other gluten-y items, so you do still have to search out gluten-free oatmeal).  I made the same granola I usually make and cut up some apples, bananas, and oranges.

When I looked up the recipe for the Baked Oatmeal in our church cookbook, I remembered why it was so good :-) A whole lot of brown sugar and oil!! I did substitute half the oil for applesauce and then added extra cinnamon and a handful of chopped apples so I could pretend that it actually had the slightest bit of health to it :-) I think it turned out pretty well, and I'll definitely be making it again. Thank goodness for church cookbooks! [And my philosophy on church cookbook recipes still applies: fantastic person = fantastic recipe ;-)] The recipe, as I made it, is listed below. 


Apple Cinnamon Baked Oatmeal

1/2 c. vegetable oil
1/2 c. applesauce
1 1/2 c. brown sugar
4 t. baking powder
1 t. salt
1 t. cinnamon (optional)
4 eggs
2 c. milk
6 c. oatmeal
1 1/2 c. apples, peeled and chopped (optional)

Mix oil, applesauce, sugar and eggs. Beat until yellow and glossy. Add remaining ingredients and mix until well-blended. Bake in greased 9x13 pan at 400 degrees for 30-40 minutes. Serves 10-12. 

Other optional add-ins: 1 c. raisins, 1/2 c. sunflower seeds, any kind of nuts, coconut, or fresh or dried fruit.

Side note: the "Planning the Menu" notepad I bought a while back came in super-handy the past 2 weeks. They let you specify the recipe, source, ingredients, and notes on the results. I used them for supper group, 2 meals for the board, and a meal I brought to a family at church. Given the proximity of all of these events piled on top of an already stacked week, I needed the extra organization!

Side side note: Thank goodness for church cookbooks, but not for church kitchens! Despite the coordinator's best effort, it is always amazing the sheer quantity of random items that show up (or more importantly, DON'T show up) in church kitchens. Items NOT found in our church kitchen as of Saturday: scissors, pen and paper, large ziploc bags, and most notably a cutting board. I ended up chopping everything on a plastic serving tray!

Monday, October 10, 2011

Improvisation

Last Friday, Ben wanted to stay home and do homework, but only after he saw the end of the Diamondbacks play-off game at his parents' house (who have cable). Since I knew this was going to be longer than he thought, I made supper there for all of us.

It was a supper of new and old things. The main dish was an improvisation of things that I had sitting around; specifically extra lasagna noodles and ricotta filling. I decided to use these to create broccoli lasagna roll-ups. Eventually, these ended up with the following: a lasagna noodle topped with ricotta, white sauce, broccoli, string cheese pieces (due to a lack of mozzarella) and then rolled up. All were placed in a dish and topped with more white sauce and a bit of cheddar cheese and then I baked the whole thing. It was a bit of an adventure, but it turned out pretty well :-) Also, yogurt dill sauce with roasted veggies was on the menu. I had bought strawberries this week and was waiting for a good reason to make strawberry shortcake and this was as good of a reason as any. (Who needs a reason for strawberry shortcake anyway??)

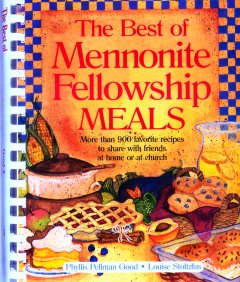
The very Greek yogurt dill sauce is from one of my favorite cookbooks, Vegetarian Cooking for Everyone and worked well on the random combination of veggies I had in the fridge (zucchini, red peppers, parsnips, potatoes, sweet potatoes, carrots, and onions). The strawberry shortcake is my all-time favorite. It's fantastic on it's own, but is killer with strawberries. It comes from the Mennonite Fellowship Meals cookbook.

Broccoli Lasagna Roll-Ups


8-10 lasagna noodles, boiled
2 heads broccoli, chopped finely
2 c. ricotta
3/4 c. parmesan, shredded
1 3/4 c. mozzarella, divided
2 t. oregano, dried
2 cloves garlic, minced
1/2 c. onion, chopped
2 1/2 c. milk
6 T. butter
6 T. flour
1 t. italian seasoning
1 t. parsley, diced
salt and pepper
2/3 c. shredded cheddar

1. Preheat oven to 350. Grease 9x13 pan. Let noodles sit in a few inches of water to prevent sticking together. Chop broccoli finely and steam in microwave or on the stovetop.

2. Combine ricotta, parmesan, 1/2 c. mozzarella and oregano in separate bowl. Set aside.

3. Saute onion and garlic in butter. Add flour and stir till bubbly. Whisk in milk and stir until thickened. Add italian seasoning, salt and pepper, and parsley. Set aside half of the white sauce.


4. On each lasagna noodle, layer 2-3 T. ricotta mixture, 3 T. sauce, 3 T. broccoli, and a sprinkle of remaining mozzarella. Roll up noodle and toppings carefully, and place in pan, seam side down. Repeat with remaining noodles. Spread remaining white sauce over rolls in pan. Sprinkle with shredded cheddar. Bake at 350 degrees for 30 minutes.

Serves 6.


Yogurt Sauce with Cayenne & Dill


1 c. yogurt
1/2 c. sour cream
1 large garlic clove, crushed
Salt
2 t. dill, chopped
3/4 t. cayenne or hot paprika

Mix all ingredients and refrigerate before serving. Yield: 1 1/2 cups.

[This sauce, plus the roasted veggies, scrambled eggs and cheese made for a great breakfast burrito!]


Best Strawberry Shortcake


1 c. butter
1 1/2 c. sugar
3 eggs
1 1/2 c. flour
1/4 t. salt
1/8 t. baking soda
1/2 c. plain, fat-free yogurt
1/2 t. vanilla
strawberries, finely diced

1. Cream butter and sugar. Add eggs one at a time, beating after each addition. Sift dry ingredients.

2. Add the dry ingredients to the batter alternately with yogurt. Beat until smooth. Blend in vanilla. Pour into greased and floured 7x11 pan.

3. Bake at 325 for approximately an hour. After cooling for 5-10 minutes, cut into 10 servings. Top with strawberries.

[Note, the original recipe is doubled and baked in 3 loaf pans. It also uses sour cream instead of yogurt. I've tried it both ways and can't tell the difference. I'd also love to make this in jumbo muffin tins for individual servings, but I don't have any. I don't know why it wouldn't work though.]

Tuesday, September 20, 2011

Super Supper

I love it when meals are surprisingly good and/or make you say out loud, "Mm, that hit the spot!" Since we were gone at church retreat last weekend, and I knew I'd be working late yesterday, I got all my groceries for two weeks the previous weekend. (I usually only buy for one week at a time.) What ended up happening: I wrote down the recipes, but not where they're from, I've used ingredients for other things as I've gotten hungry, and I wasn't sure what was actually in the fridge. So, tonight's meal was definitely going to be a bit of a surprise ending. Additional point of consideration: Ben wanted supper before he left for a meeting, so I was hurrying through my somewhat improvised chopping to get it ready in time.

The original "entry" on my menu was for Sun-Dried Tomato Pesto Pasta and Chipotle Veggies. I intended to use the pesto (from here) that my dear mama purchased for me at the farmer's market when she was here recently, which I did (though I did have a momentary heart attack while the pasta was draining when I realized I hadn't seen it in the fridge in days and thought I had used it.)  I have no idea what the tomatoes in the fridge were originally for, but they got thrown in the pasta for added texture. The parmesan cheese that I was planning on using is now "in absentia," so mozzarella got used instead.

For the veggies, I realized that 1) I had no recipe for it, 2) no idea which veggies I planned on using, and 3) the only available veggies were carrots, potatoes, lettuce, cilantro, and tomatoes. So, after a bit of mucking around allrecipes.com, I managed to locate an interesting-looking grill marinade that I adapted a bit to work for my situation.

Added bonus: I had been wanting salad all week and forgot I had lettuce, so that got chopped up along with some of the tomatoes and two random hard-boiled eggs left in the fridge. The dressing I used was ranch and chipotle salsa. End result? I really enjoyed everything. Ben didn't eat because he was working on homework :-) More for lunch tomorrow!

Sun-Dried Tomato Pesto Pasta


1 lb. whole grain pasta
4 oz. sun-dried tomato pesto
2-3 Roma tomatoes, diced
mozzarella cheese

Boil pasta and drain. Return pasta to pan and add pesto. Mix with pasta until evenly coated. Toss pasta with tomatoes. Serve with mozzarella cheese sprinkled on each serving. Serves: 4-6.

Roasted Chipotle Veggies
8-9 medium carrots, peeled
5-6 medium potatoes, peeled

Marinade: 
1/3 c. oil
1/4 c. apple cider vinegar
3 T. cilantro, chopped
1 chipotle pepper in adobo sauce, chopped
1 t. salt
1 t. paprika
1 t. cumin

Preheat oven to 425. Whisk marinade ingredients in the bottom of a large bowl. Chop vegetables in 1/2 inch chunks and mix with marinade. Spread veggies on baking sheet(s) and roast for 25 minutes, stirring half-way through baking time.
Serves: 4

Mexican Salad
1 bunch lettuce, chopped
2 Roma tomatoes, chopped
2 hard-boiled eggs, chopped
1 c. black beans, cooked
1 c. corn, cooked

Dressing:
1 c. ranch salad dressing
1-2 T. salsa

Combine dressing ingredients and chill until ready to serve. Toss remaining ingredients in a salad bowl and serve with dressing on the side.

[Photos from church retreat. The comic was made using my iPod Touch and the Halftone app, which I LOVE!.]

Monday, September 12, 2011

Aaaand...we're up and running!

It's been a busy month, with school starting and getting everything organized. Ask any teacher how the first 2-4 weeks of school is, and inevitably you'll get some sort of answer along the lines of:

Whew!
Busy!
Running around like a chicken with my head cut off!
I still have TONS to do and I've been at school every night till 6!
I'm not so sure about this class...
I forgot how much work this is!
Collecting forms bites!
If only I'd stop getting new students!
Etc
Etc
Etc

I'm finally starting to get everything how I want it (though I still have emergency sub plans to write) so now I have a bit of time to consider the food that I'm actually putting on the table. Tonight for supper group, given that I had a bunch of quinoa around (thank you Costco!), I made this chicken with quinoa and vegetable dish from allrecipes.com, along with mom's italian vegetable salad, bread and jam, and these fantastic banana chocolate chip cookies from Taste of Home. They're almost cake-like :-) Definitely a fantastic use for bananas that are on the verge. There was definitely some double-fisting going on by the kids :-) 
Banana Chocolate Chip Cookies 

1/3 c. butter, softened
1/2 c. sugar
1 egg
1/2 c. banana, mashed
1/2 t. vanilla
1 c. flour
1 t. baking powder
1/4 t. salt
1/8 t. baking soda
1 c. chocolate chips

Cream butter and sugar together until light and fluffy. Add egg, banana, and vanilla. Whisk flour, baking powder, salt, and baking soda in separate bowl. Slowly add the flour mixture to the wet ingredients. Fold in chocolate chips. Drop by teaspoonfuls onto greased baking sheet, leaving 1-2 inches between each. Bake at 350 for 9-11 minutes, until edges have browned. 

Yield: 3 dozen (though for the size I was making them, it was more like 2 dozen) 


Thursday, August 11, 2011

Summer Grilling Goodness

It's August, which means we're midway through the dead of summer, with about a month to go. This also means that at this point, we're getting tired of salad and watermelon. Ok, I take it back, I can never get tired of watermelon, but we're definitely in need of some variety in the diet. Hence, when I ran across this quinoa salad from Canadian Living magazine on a blog, I thought it sounded like an excellent change of pace (along with some egg salad). However, since I was not paying attention when I grocery shopped, I had to make do with what I had (no big surprise). So, my version is a tiny bit modified (as described below). 

Grilled Vegetable Quinoa Salad with Chipotle Vinaigrette 
Salad: 
1 c. quinoa, uncooked
2 bell peppers, quartered
1 zucchini (green or Mexican), cut in 1/2 in. thick strips, lengthwise
4 medium carrots, peeled and sliced in diagonal 1 in. chunks
1/2 c. goat cheese, crumbled
3 T. cilantro, chopped

Chipotle Vinaigrette
3 T. olive oil
2 T. red wine vinegar
1 canned chipotle pepper in adobo sauce, minced
2 t. honey
1/2 t. cumin
1/4 t. salt
1/4 t. pepper

1. Boil quinoa in 2 c. salted water for 12 minutes. Remove from heat, fluff with fork and let sit for 15 minutes. 
2. Meanwhile, whisk together vinaigrette ingredients and set aside. 
3. In large bowl, toss peppers, zucchini, carrots and 3 T. vinaigrette together until coated. Place on greased grill over medium heat, and grill until charred and tender (between 8-115 minutes, depending on the size of the vegetable chunk). Cut into large chunks and return to bowl. 
4. Add remaining dressing, quinoa, cheese, and cilantro. Stir to combine. Serve immediately. 
Serves 6.


Friday, August 5, 2011

Back to School with Ice Cream!

Every year, as people reluctantly trickle back into Phoenix in July and August (having spent as much of the summer as possible out of the heat), my church holds its annual Back-to-School Ice Cream Social. This event holds two purposes: 1-it raises money for a scholarship fund to help kids attend church schools, and 2-it functions as a blessing on the year, by praying for students of all ages, teachers, support staff, and parents. As I was preparing the ice cream I planned to bring, a friend said that she would have just bought some gourmet ice cream. I said, "No, you don't understand. Everyone who volunteers to bring ice cream is volunteering to bring an ice cream freezer of homemade ice cream." So, the event also ends up being a bit of an ice-cream potluck.

This year was a battle for me to get the ice cream done, since we had been camping all weekend. (Technically, we were yurt-ing :-) We stayed in a large, round, structured tent in northeastern AZ. Good times :-) See pictures.) We got home from camping at about 4:45, and I needed to leave the house at 5:45 with a finished freezer of ice cream AND shower. Yikes.

I picked a strawberry ice cream recipe, because I'm pregnant and that's what I'm in the mood for. And strawberries were on sale for 77 cents per container. :-) I was a little worried about the ice cream given that I had never made it before and it had no eggs (raw or cooked) in it. Every ice cream I've ever made has some amount of eggs in it. But, the reviews on the recipe sounded good, so I gave it a shot. After an ultra-fast shower, I chopped bunches of strawberries and mixed up the batter.

Going against some people's recommendations, I multiplied the recipe times 1.5, hoping it wouldn't overflow my 5 quart ice cream maker, which I'd never had happen. I felt pretty safe given the fact that this recipe seemed to make a lot less, and in reality, only filled up my ice cream maker about 2/3 full. (My normal recipe ends with "Then fill up the rest of the ice cream maker with milk to the top rim." Expansion has never been a problem.) I put the ice cream in to churn at 5:20, and at 5:43, the motor finally stopped. (Trying to "freeze" ice cream outside while its 105 degrees is a fairly humorous battle. I was outside adding ice at least every 5 minutes. And salt. Lots of salt.) The ice cream definitely did eventually expand enough to fill the entire container, but it only overflowed a tiny bit.

When I got there, my strawberry ice cream and I were standing among the likes of such flavors as Wendy's Frosty flavor, Very Peanut Butter, Blueberry, Coconut, and Mango Habanero (and 3 different versions of vanilla). As I dipped out my untasted ice cream for people when they walked through the line, people kept coming back and commenting on how creamy it was, that they loved the texture, and the generally yummy flavor. When I finally got a chance to enjoy some, it turned out they were right :-) I got the original recipe from Allrecipes, but modified it just a bit. Below is the 1.5x recipe along with my adaptations. (And a potluck success: I went home with an empty container!)

Summer Strawberry Ice Cream

2 c. cream
4 c. half and half
1 1/2 c. white sugar
1/3 t. salt
1 T. vanilla
3 c. mashed strawberries (to desired consistency)

 1. Combine all ingredients and mix with hand mixer or whisk. Pour into 5 quart ice cream maker bowl and freeze according to manufacturer's instructions.


(Top picture: our yurt, in Lyman Lake State Park, near St. John's, AZ. In Steve's words, "all the good parts of camping, and none of the bad parts," i.e. setting up tents.)
(Middle picture: Darla & Steve Schrock and Laura Glass-Hess as we go on a self-guided petroglyphs tour at the campground.)
(Bottom picture: Darla has mastered the Jet-ski --probably due to the compressing features of the wetsuit--and celebrates accordingly.)